

Physics around us: from a first experiment to your own lab Lesson 66 of 66
Checkpoint: design an open-door signal
Bring magnetism, a safe circuit and a testable message together in one model.
Situation and prediction
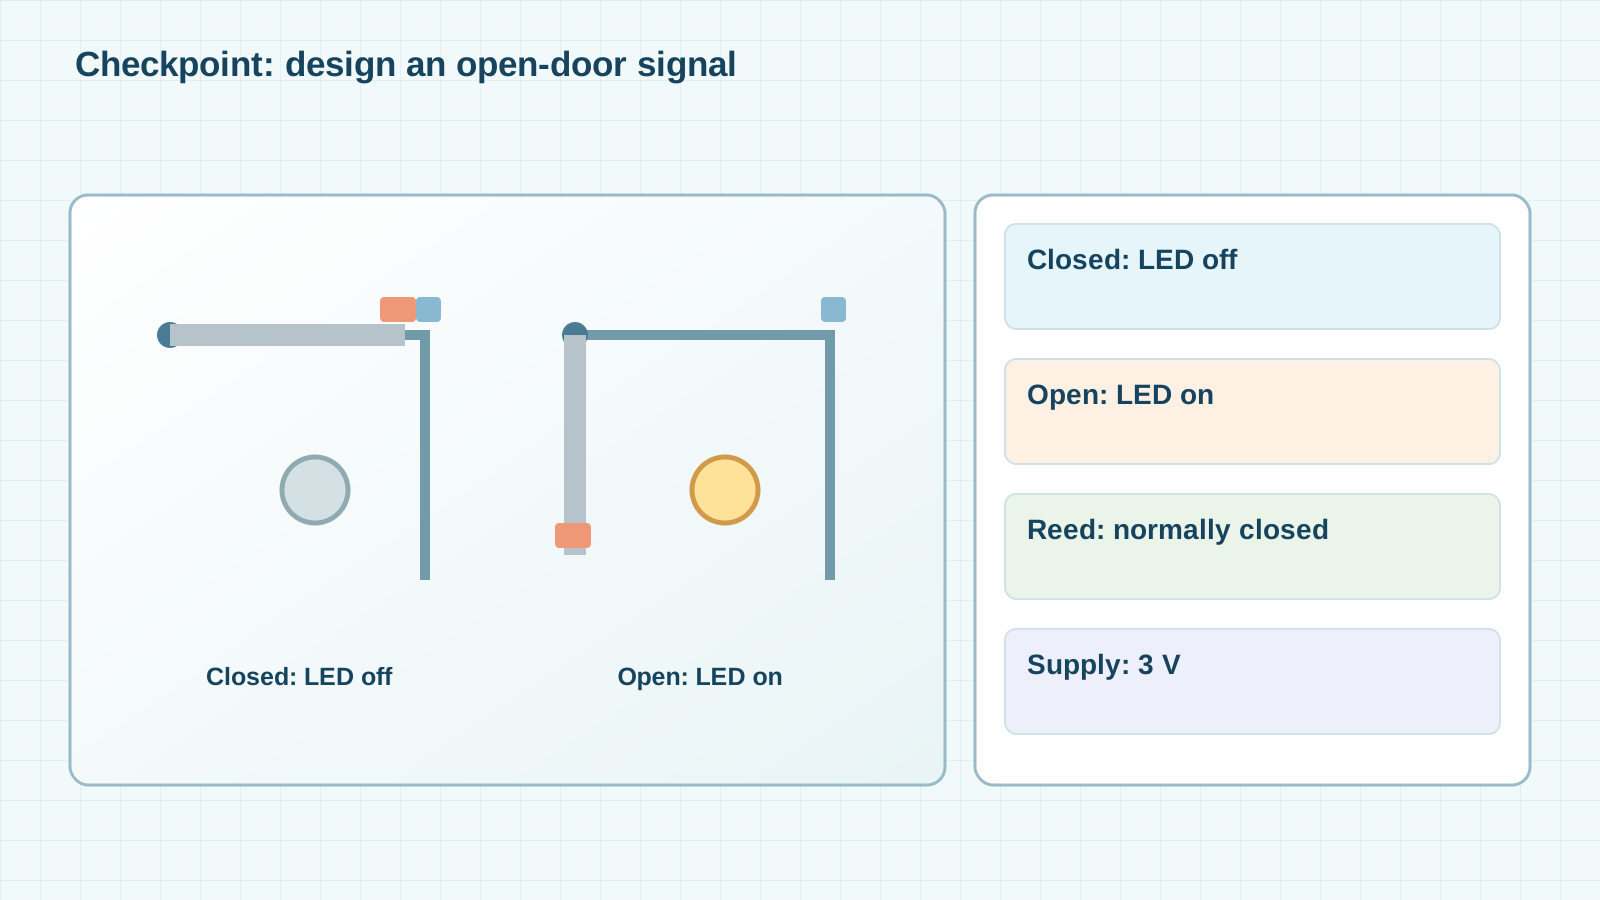
A model room needs a lamp to report that its door opened. You know about magnets, current, closed paths and codes. On paper put a small magnet on the door and a reed switch on the frame. Predict which door position closes the circuit. Some reed switches close near a magnet and others open: check the chosen sensor type.
New words, step by step
A reed switch has contacts sealed in a capsule and responds to a nearby magnet. A sensor turns a change in surroundings into a distinguishable electrical signal. A normally open reed switch is open with no magnet and closes near one. In a simple series circuit it cannot light an ‘open door’ lamp without an inverting circuit; instead choose a normally closed type or suitable control module. The type names refer to the no-magnet state.
Working through supplied data
Supplied table for a normally closed reed switch: door closed, magnet near — contact open, LED off; door open, magnet far — contact closed, LED on. Supply is 3 V, with a ready-made current-limited LED module in series. This is a logic model, not advice to connect a bare LED straight across a battery.
A safe check
First check both states on paper and show the diagram to an adult. Any real build uses only a ready-made low-voltage kit with a protected LED module. Do not use this model on a real front door as a security system. Record possible false signals if the magnet shifts and how to test them.
Where the reasoning breaks
One successful door opening does not make a sensor reliable. Repeat cycles, vary the door position and test false alerts. Do not mix contact state with message meaning: ‘circuit closed’ means ‘door open’ only because of the placement and agreed rule.
Support diagram
Transfer to a new case
Add a second lamp to report ‘door closed’, without connecting two bare LEDs directly to a battery. Which contact types and data would you need? Explain how to test both messages without calling a prediction a measurement.
Check your understanding
Close the explanation and say in your own words what was really observed, which figures were supplied for teaching, and which conclusion remains a prediction. Change one condition and predict the result before rereading. If it disagrees, find the first step where your reasoning parted from the diagram. A strong answer names the model’s limits rather than just a correct word or number. You can do this check on paper, without equipment or registration.
Lab notebook entry
Add a page to My World Lab Notebook. Record the question, a prediction made before testing, a sketch and a table of conditions. Keep actual observations separate from supplied teaching numbers. In the final line say what changed, what stayed constant, what the evidence supports and what it does not yet prove. If you did no experiment, label the work ‘calculation from supplied data’ or ‘prediction’, never ‘measured’.
If you have found a mistake or a typo in this article, tell us about it
Comments (0)
Log in to leave a comment →
No comments yet. Be the first.